Short-row heel (narrow heel, low instep)
Afterthought heel (medium heel, medium instep)
Heart-shaped heel with a heel flap and gusset (wide heel, high instep)
Short-row heel with round shaping (wide heel, low instep)
Hybrid heel (narrow heel, high instep)
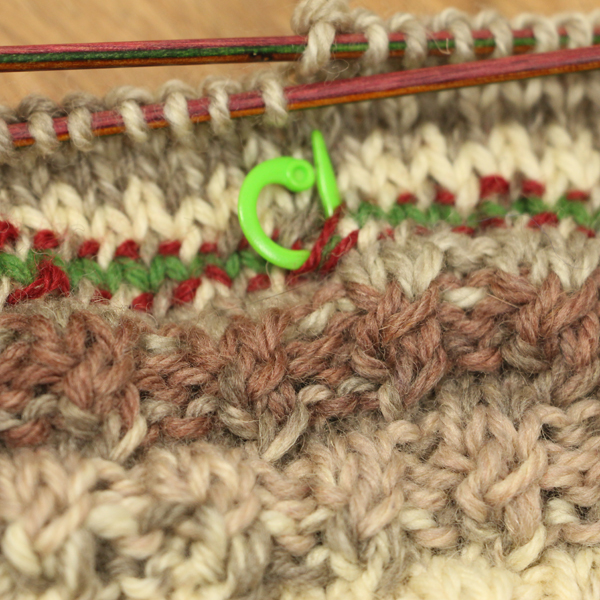
Dividing your stitches
See the end of this post for how to divide your heel sts into panels for the most common stitch counts
Abbreviations
BOR beginning of round
Cont continue
Dec decrease
dec’d decreased
HF heel flap
K, k knit
k2tog knit 2 stitches together
m marker
p2tog purl 2 stitches together
PM place marker
rep repeat
Rnd(s) round(s)
skp slip one as if to knit, knit one, pass the slipped stitch over
sm slip marker
ssk slip one as if to knit, slip one as if to purl, insert the left-hand needle through the front of the slipped stitches and knit them together through the back loop
St st stockinette stitch
st(s) stitch(es)
w&t wrap and turn (see tutorial for short rows here: https://knittedinswitzerland.ch/?p=2089)
Option 1: Short-row heel (narrow heel, low instep)
Place markers to divide the heel sts in two side panels and one center panel. If the number of your heel sts cannot be divided by 3, make the center panel a little bigger.
Upper Section
Row 1 (RS): K to last heel st, w&t.
Row 2 (WS): P to last heel st, w&t.
Row 3: K to one st before last wrapped st, w&t.
Row 4: P to one st before last wrapped st, w&t.
Repeat the last 2 rows until all side panel sts have been wrapped.
Additional Rounds
Work 2 rnds, working the sole stitches in stockinette and working each wrap together with its stitch as you come to them, and the instep sts in pattern. End the second round in the middle of the center panel.
Again, for this next section you will only be working on the sole sts.
Lower Section
Row 1: K to m, sm, w&t.
Row 2: P to second m, sm, w&t.
Row 3: K to wrapped stitch, work the wrap together with its stitch, w&t the next st.
Row 4: P to wrapped stitch, work the wrap together with its stitch, w&t the next st.
Repeat the last 2 rows until all side panel sts have been worked as wrapped stitches. Turn so you are facing the RS of the piece. You will be at the beginning of the sole sts.
Continue with the foot and remove the heel markers.
Option 2: Afterthought heel (medium heel, medium instep)
To have the numbers work out as written, your stitch count for the heel stitches needs to be a multiple of 4.
When you have completed the last rnd of the leg, knit the heel stitches with a length of waste yarn in color B. Insert a lifeline in color A into the stitches directly below the waste yarn.
Knit the heel stitches again with your working yarn and insert a lifeline in Color A.
Continue with the foot. When you are ready to work the heel, place the stitches on the lifelines onto your needles and distribute them evenly. Remove the lifelines and the waste yarn.
Join your working yarn so the BOR is in the middle of the sole sts. Place markers to divide your heel sts into 4 equal parts.
Rnd 1: *K to 3 sts before m, k2tog, k1, sm, k1, k to next m; rep from * once more. (4 sts dec’d)
Rnd 2: Knit.
Repeat these two rnds until 32 sts remain, then repeat just rnd 1 (the Dec-Rnd) 4 times more. (16 sts).
Break the yarn and thread it through the remaining sts twice, pulling them tight.
Option 3: Heart-shaped heel with heel flap and gusset (wide heel, high instep)
Heel flap
Row 1 (RS): Knit to the end of the heel sts.
Row 2 (WS): K1, p to last heel st, k1.
Repeat rows 1 and 2 until you have worked as many rows total as you have heel sts. While working the last WS row, place a marker in the middle of the heel to divide it in two panels.

If you find your socks are wrinkly at the transition from ankle to foot, make the heel flap a few rows shorter.
If your socks feel tight around the instep, make the heel flap a few rows longer.
Heel turn
Row 1 (RS): Sl 1 pwise wyib, k to m, sm, k1, ssk, k1. Turn. (1 st dec’d)
Row 2 (WS): Sl 1 pwise wyif, p to m, sm, p1, p2tog, p1. Turn. (1 st dec’d)
Notice the little gap at the turning points.
Row 3: Sl 1 pwise wyib, k to one st before the gap, ssk (gap closed), k1. Turn. (1 st dec’d)
Row 4: Sl 1 pwise wyif, p to one st before the gap, p2tog (gap closed), p1. Turn. (1 st dec’d)
Repeat rows 3 and 4 until all heel sts have been used up. If you have an odd number of sts per panel, the last RS row will end with an ssk and the last WS row will end with a p2tog.
Next row: K to m – this is now your BOR.
Gusset
The garter st edge you have worked during the heel flap creates little “bumps” – half as many bumps as you have heel sts.
Next rnd: K to the end of the heel sts, pick up one st from every bump at the side of the heel flap, then pick up one more st from the thread between the heel flap and the instep sts, PM(HF1), work the instep sts in pattern, PM(HF2), pick up one st from the thread between the instep sts and the other side of the heel flap, then pick up one st from every bump at the other side of the heel flap (so the same number of stitches as for the other side), k to end.
Next rnd: K to m(HF1), work instep sts in pattern to m(HF2), k to end.
Next rnd: K to 3 sts before m(HF1), k2tog, k1, work instep sts in pattern to m(HF2), k1, ssk, k to end. (2 sts dec’d)
Repeat these two rounds until you have the original number of sts you had before the heel.
Option 4: Short-row heel with round shaping (wide heel, low instep)
Place markers to divide the heel sts in two side panels and one center panel. If the number of your heel sts cannot be divided by 3, make the center panel a little bigger.
Upper Section
Row 1 (RS): K to last heel st, w&t.
Row 2 (WS): P to last heel st, w&t.
Row 3: K to one st before last wrapped st, w&t.
Row 4: P to one st before last wrapped st, w&t.
Repeat the last 2 rows until all side panel sts have been wrapped.
Additional Rounds
Work 2 rnds, working the sole stitches in stockinette and working each wrap together with its stitch as you come to them, and the instep sts in pattern. End the second round in the middle of the center panel.
Again, for this next section you will only be working on the sole sts.
Lower section
Row 1 (RS): K to last heel st, w&t.
Row 2 (WS): P to last heel st, w&t.
Row 3: K to one st before last wrapped st, w&t.
Row 4: P to one st before last wrapped st, w&t.
Repeat the last 2 rows until all side panel sts have been wrapped.
Option 5: Hybrid heel (narrow heel, high instep)
Heel flap
Row 1 (RS): Knit to the end of the heel sts.
Row 2 (WS): K1, p to last heel st, k1.
Repeat rows 1 and 2 for about 8-12 rows total. While working the last WS row, place markers (labeled A) to divide the heel sts in two side panels and one center panel. If the number of your heel sts cannot be divided by 3, make the center panel a little bigger.
Upper Section
Row 1 (RS): K to last heel st, w&t.
Row 2 (WS): P to last heel st, w&t.
Row 3: K to one st before last wrapped st, w&t.
Row 4: P to one st before last wrapped st, w&t.
Repeat the last 2 rows until all side panel sts have been wrapped.
Additional Rnds
The garter st edge you have worked during the heel flap creates little “bumps” – you will have half as many bumps as rows in the heel flap.
Next rnd: K to the end of the heel sts, working each wrap together with its stitch as you come to them, PM(Sole1), pick up one st from every bump at the side of the heel flap, then pick up one more st from the thread between the heel flap and the instep sts, placing all picked up sts on the same needle as your sole sts, PM(HF1), work the instep sts in pattern, PM(HF2), pick up one st from the thread between the instep sts and the other side of the heel flap, then pick up one st from every bump at the other side of the heel flap (so the same number of sts as for the other side) and place them on the needle holding your heel sts, PM(Sole 2), k to the middle of the heel sts working each wrap together with its stitch as you come to them.
Rnd 2: K the sole sts and the sts you just picked up from the side of the heel flap, work the instep sts in pattern, knit the sts you just picked up from the other side of the heel flap, k to end.
Lower Section
Row 1: K to m(A), sm, w&t.
Row 2: P to second m(A), sm, w&t.
Row 3: K to wrapped stitch, work the wrap together with its stitch, w&t the next st.
Row 4: P to wrapped stitch, work the wrap together with its stitch, w&t the next st.
Repeat the last two rows until all side panel sts have been worked as wrapped sts.
Gusset
Next rnd: K to m(HF1), work the instep sts in pattern to m(HF2), k to end.
Next rnd: K to 3 sts before m(HF1), k2tog, k1, work the instep sts in pattern to m(HF2), k1, ssk, k to end. (2 sts dec’d)
Repeat these two rounds until you have the original number of sts you had before the heel.
Remove all markers you placed while working the heel. PM for BOR after the instep sts.
Dividing your sts into equal parts for the heel
| Number of heel sts | 22 | 24 | 26 | 28 | 30 |
| Divide into two panel by placing markers after sts | 11 | 12 | 13 | 14 | 15 |
| Divide into three panel by placing markers after sts | 7 and 15 | 8 and 16 | 8 and 18 | 9 and 19 | 10 and 20 |
| Number of heel sts | 32 | 34 | 36 | 38 | 40 |
| Divide into two panel by placing markers after sts | 16 | 17 | 18 | 19 | 20 |
| Divide into three panel by placing markers after sts | 10 and 22 | 11 and 23 | 12 and 24 | 12 and 26 | 13 and 27 |
| Number of heel sts | 42 | 44 | 46 | 48 | |
| Divide into two panel by placing markers after sts | 21 | 22 | 23 | 23 | |
| Divide into three panel by placing markers after sts | 14 and 28 | 14 and 30 | 15 and 31 | 16 and 32 |